I get a lot of questions about the photos that I post on Instagram, and I've always been hesitant to give my advice because, who am I? I'm still learning about photography on a daily basis myself! I didn't go to school for this. Everything I know about photography has been learned through:
1) Youtube & Skillshare.
2) People I know in real life.
3) Trial & Error.
I'm not a guru, nor will I ever claim to be. But, I do feel like I'm finally in a place to where I'm comfortable with sharing more about my process and giving tips, etc. So, here goes nothin!
First, the tools.
For this recent photoshoot with model Emma, I shot with my Canon 6D Mark II, and I used my Sigma 50mm f/1.4 Art Lens. This is a super dope combo for portraits. I recently upgraded to the 6D Mark II (it's my first full-frame camera) and I couldn't be happier. 😁
If you have a camera that gives you the option to shoot in Raw format, do it. Shooting images raw (instead of in JPEG format) will allow MUCH greater freedom in the editing process. 👌
The Shoot
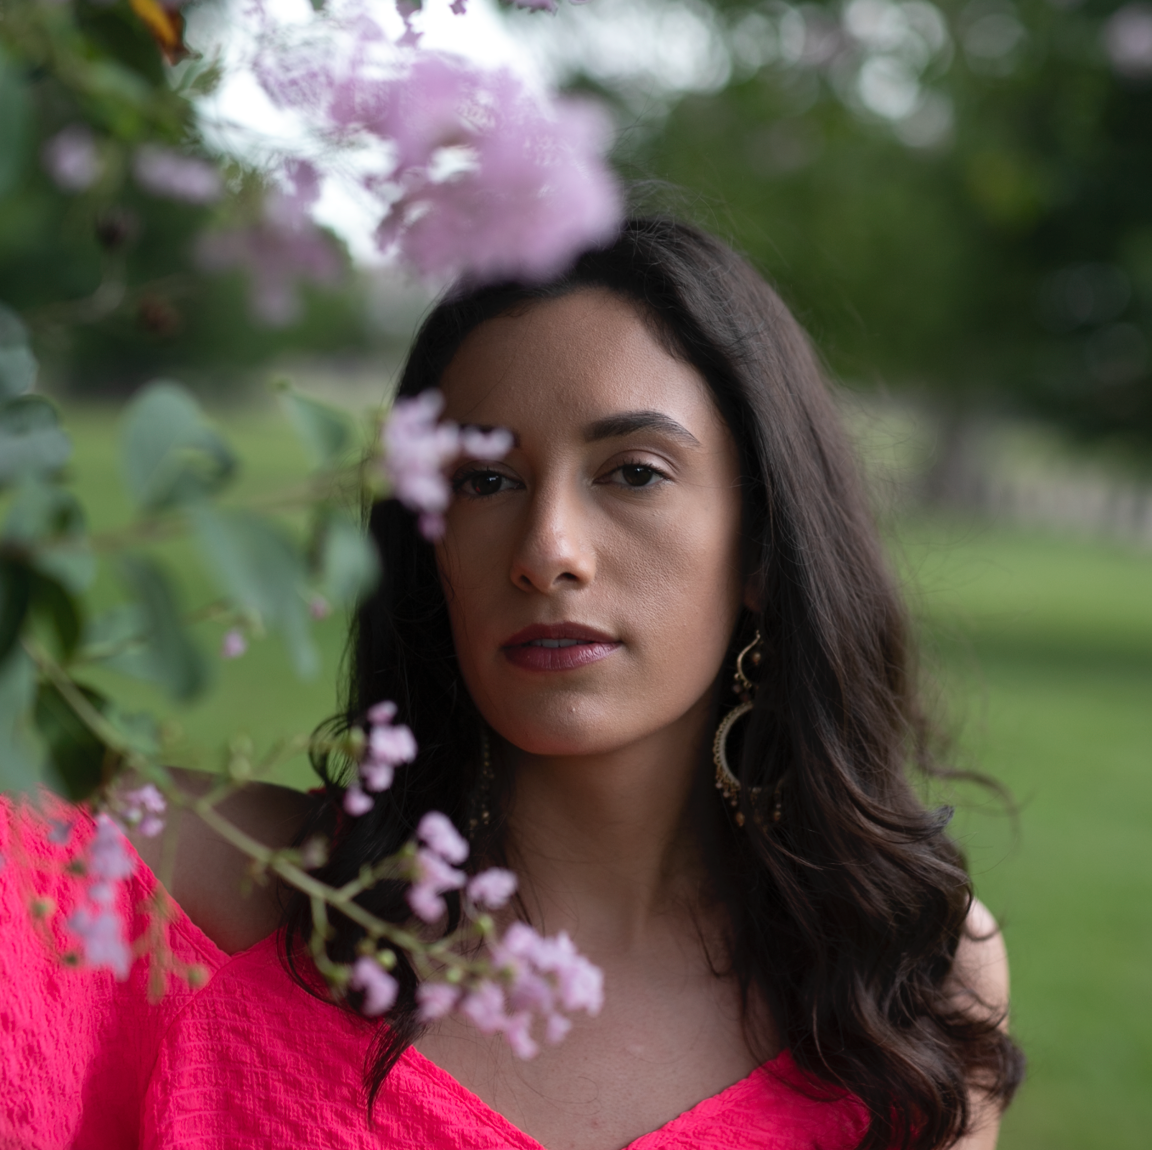
My inspiration behind this particular shoot was these beautiful crepe myrtle trees that have been blooming all over New Orleans in the past few months. They all have these beautiful pink/red/purple flowers and it's not often we get beautiful nature in New Orleans. Normally, we just get humidity and afternoon showers lol. I knew I had to get a photoshoot in before they all started to die.
My usual style of portraits are very street-inspired, and when I edit, I usually add contrast and darken the blacks and bring up the Clarity a little, etc. For this shoot, I wanted it to feel very soft and warm; like the trees. We shot at 5PM, and riiight before a thunderstorm. NOLA weather in the summer is literally like a Lana Del Rey song.
The Photo
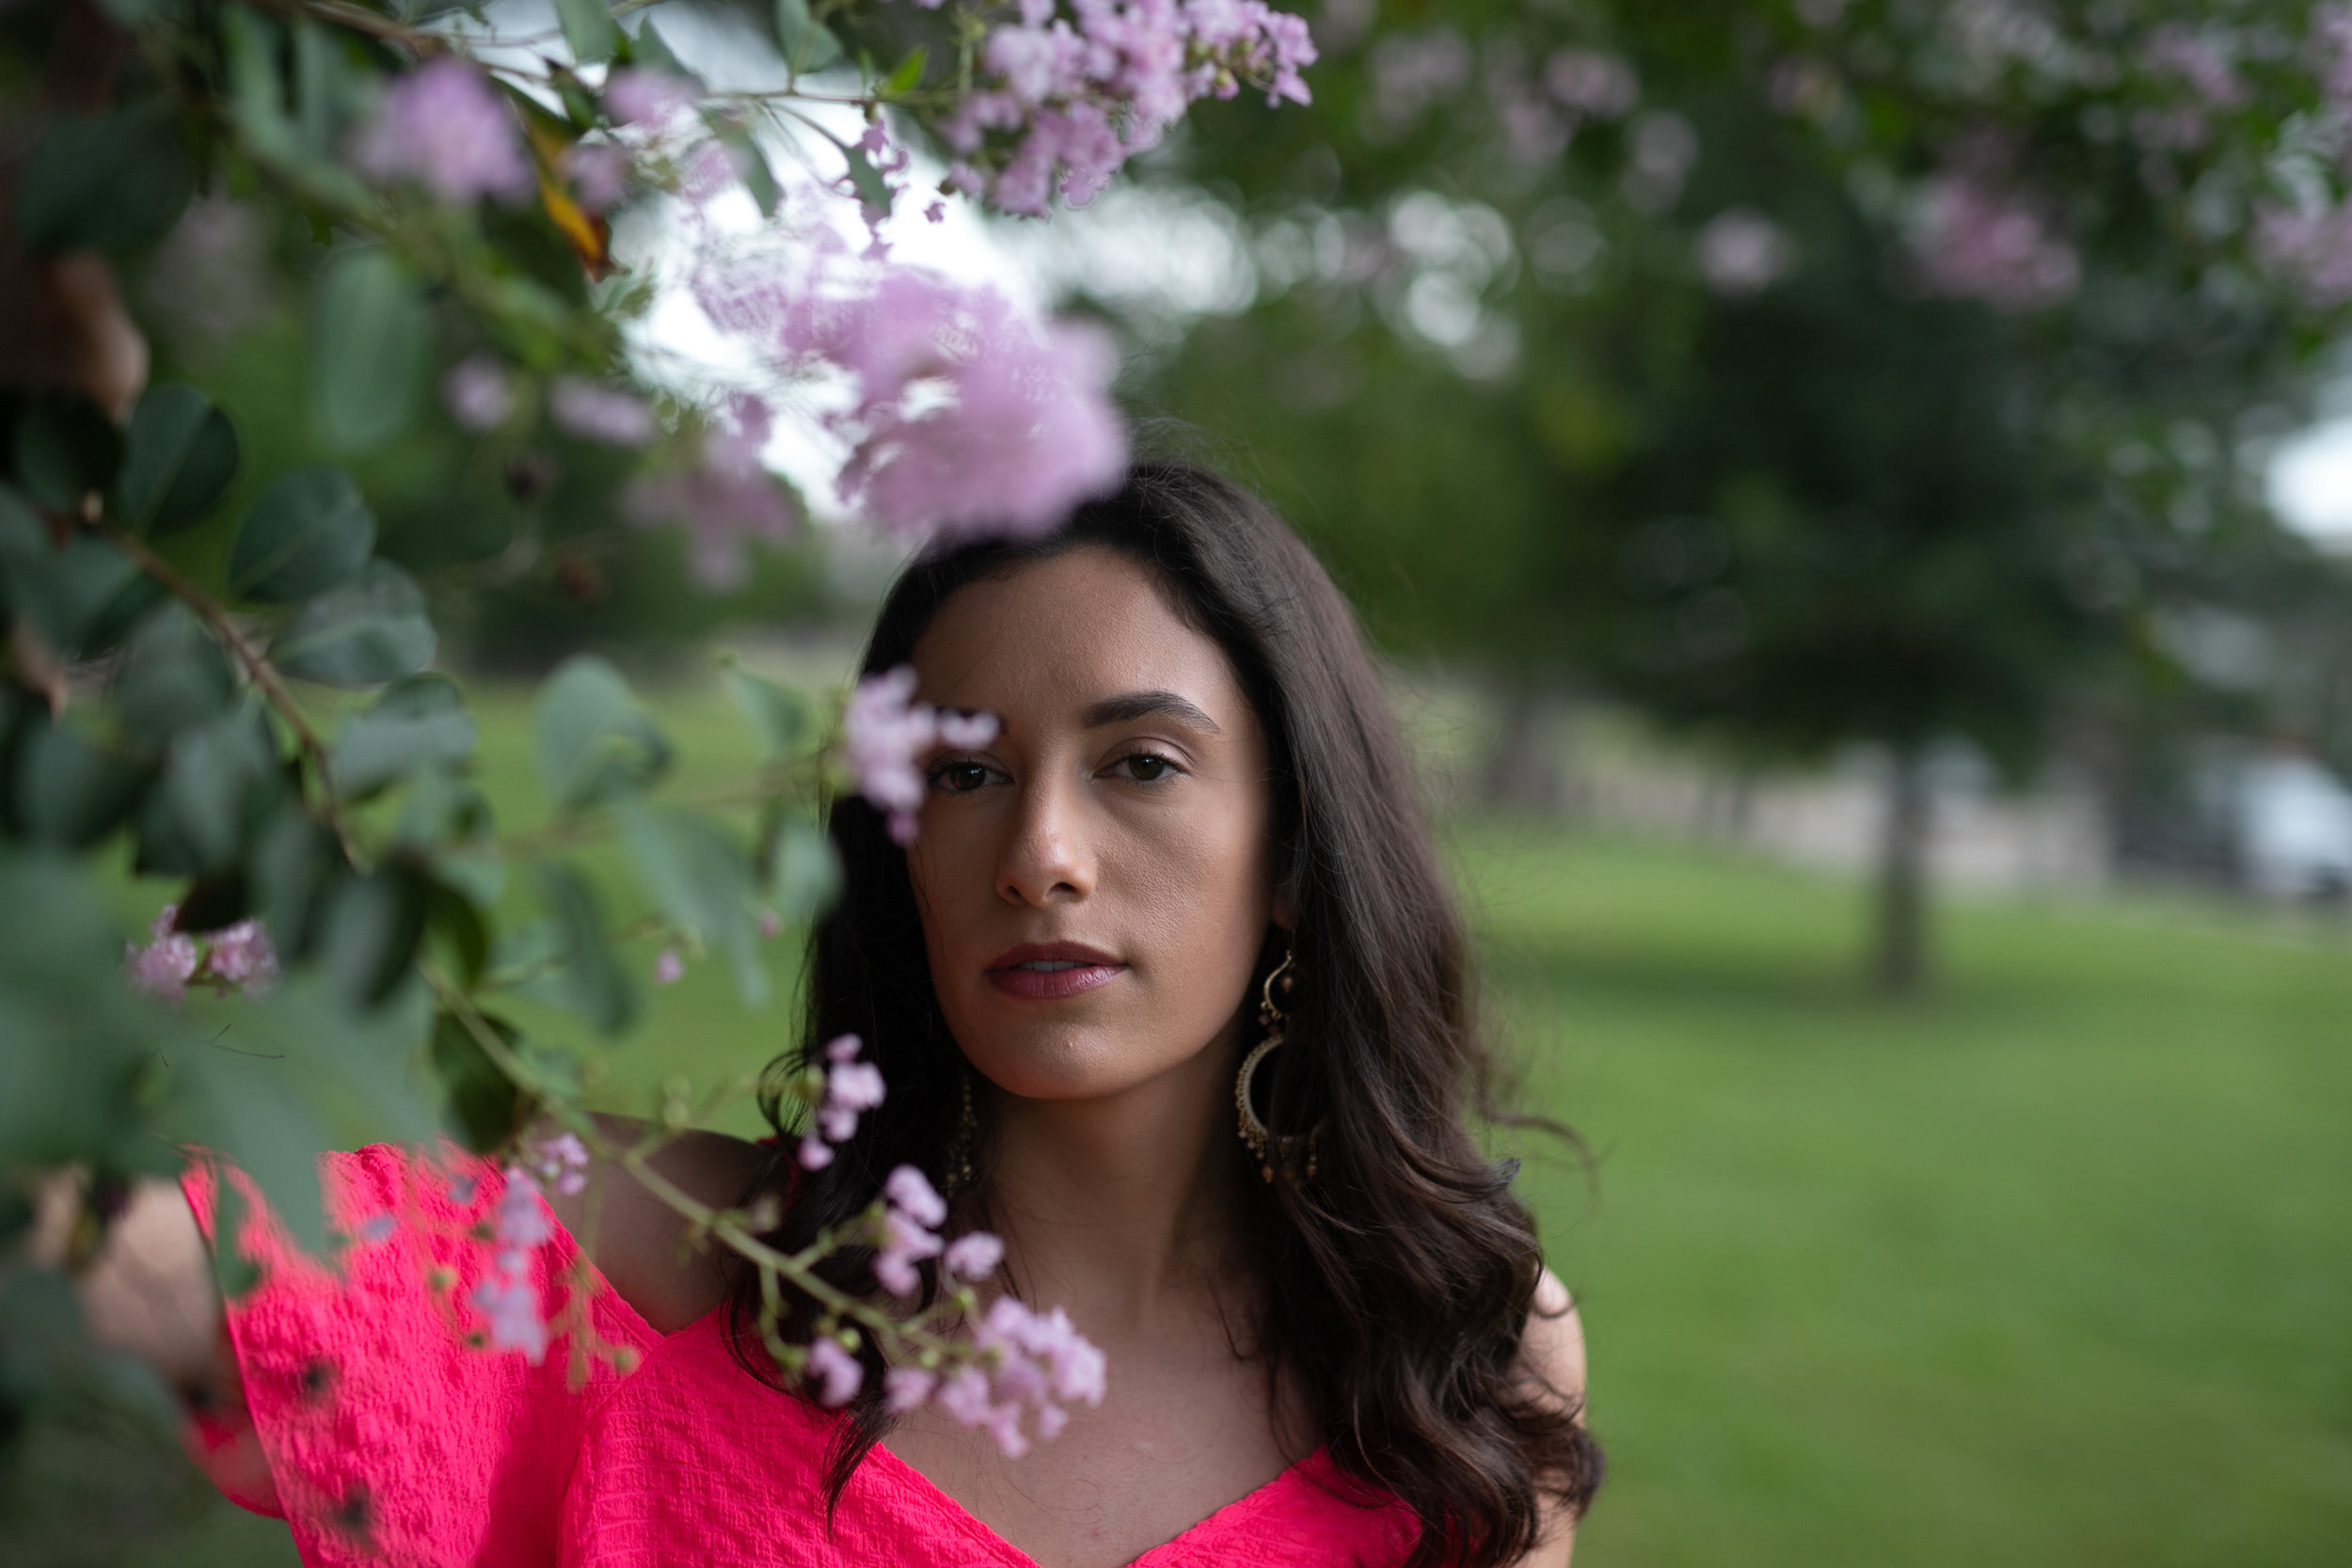
I really like the vibe of this photo. And I LOVE the way the purple-ish flower falls right above her eye and helps to frame her face. It's a winner. It'a a banger! 🔥
For me, I don't like posting photos in Landscape on Instagram, unless absolutely necessary. Being a social media strategist by day, I know for a fact that Landscape photos don't perform as well as square photos (1:1) or vertical photos (4:5). So, it's time to crop.

I shot this image knowing that I was going to crop into it. I cut out most of the right side of the original, and cropped more into Emma's face to make her the star of the show. I'm super happy with this, but I know that I need to clean up a few things and add my personal style to it.
The Editing
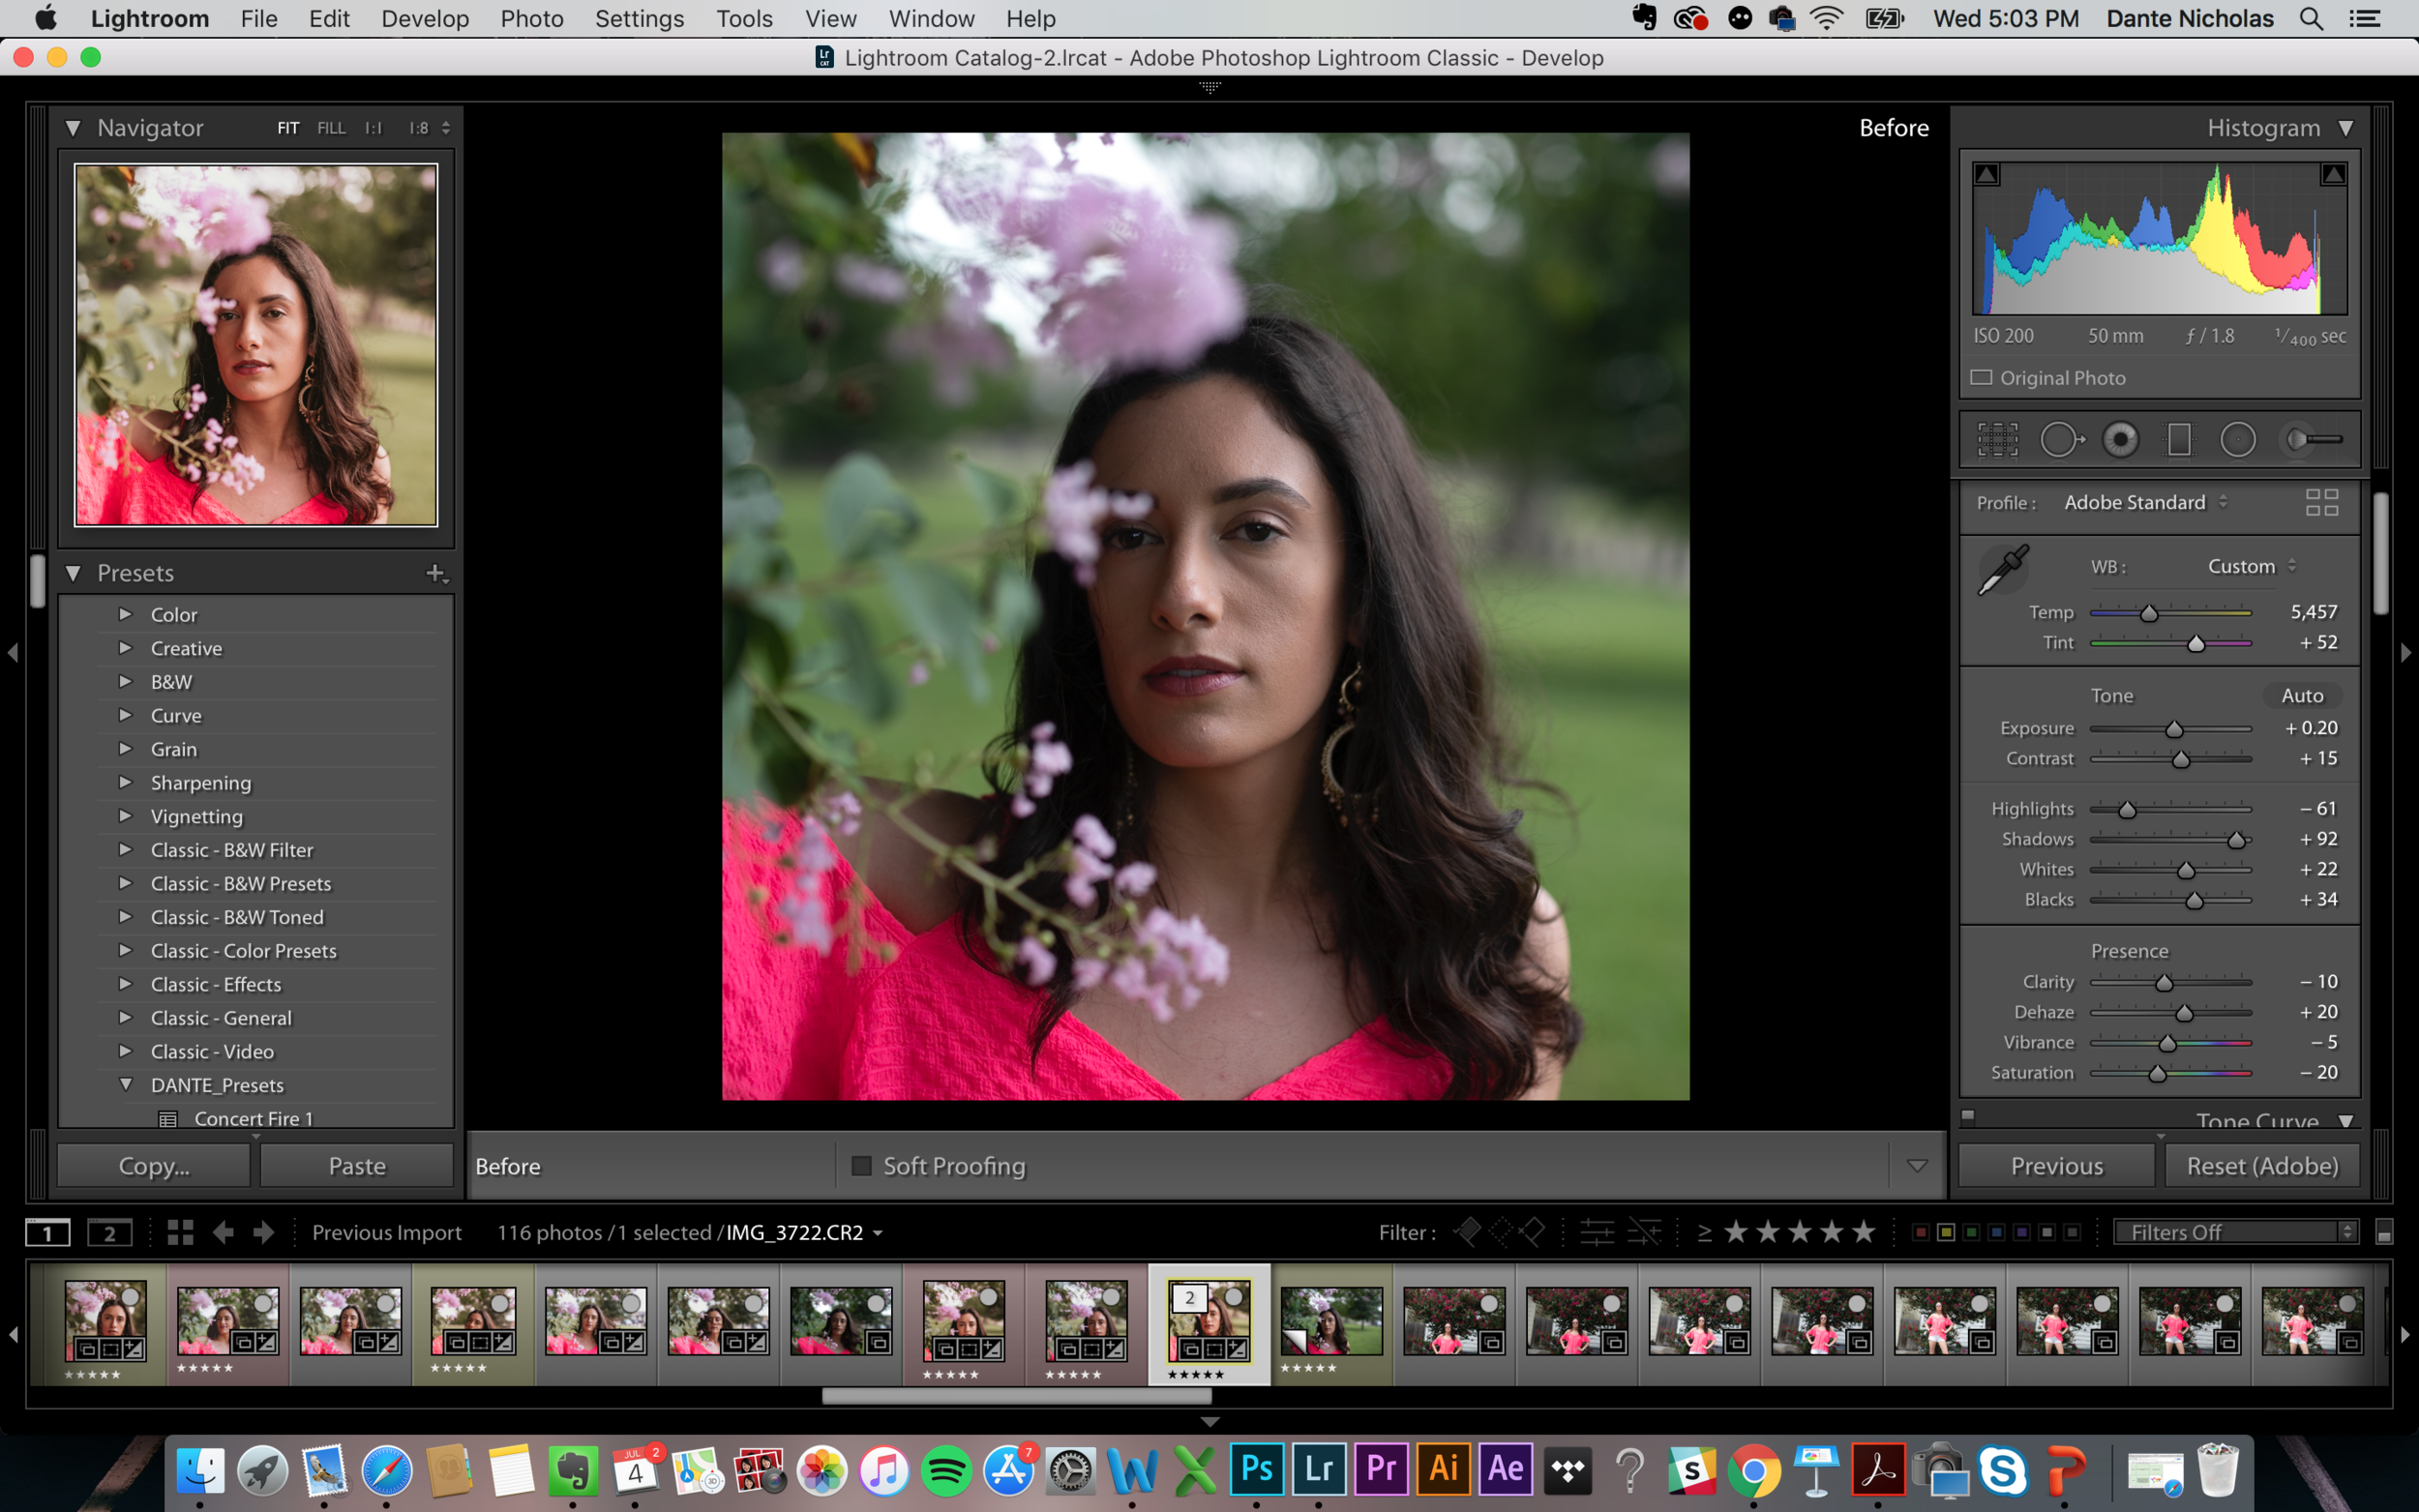

First, you'll notice that I shot this image at Aperture f/1.8, a shutter speed of 1/400, and ISO 200. These three variables can make or break an image (here's a quick tutorial). For this image, I knew that I didn't want to shoot wide open (at f/1.4) and completely lose the background, so I shot at f/1.8. It was getting pretty dark out due to pending thunderstorms, so I used a shutter speed of 1/400 and bumped the ISO up to 200.
I wanted to bring more light & detail to Emma's hair & face, so I bumped Exposure up a lil bit and and then bumped Shadows up a lotta bit! I increased the Warmth from 4850 to 5457, and brought the Tint over to the magenta side to help capture the mood that I was going for. Minimally increasing Contrast and Dehaze allowed me to add some pop into the image, without going overboard and losing the softness.
I did a lot of playing around with the colors in the HSL sliders. Mainly, I desaturated the greens and manipulated the magenta hue to tone her blouse down a little. The rest – that's a topic for another time. Just know, HSL sliders can truly transform an image, as you get complete control of each individual color that's in your photo. You can completely take out blues or greens. You can change red to orange, yellow to green, etc. Crazy stuff!

After I'm done with Lightroom, the above is my end result 🔥🙌. But, I want to add some finishing touches, and I do that in PhotoShop.
The last thing I do for portraits is called frequency separation. Frequency separation is the technique I use to retouch skin. Most professional photo retouchers use the Dodge & Burn technique. But, what I love most about frequency separation is that you can clean up the skin without completely losing the skin's texture. Texture is important. Pores are important! I'm not a fan of the super airbrushed, Facetune look. I clean up the lines in the face, balance out the skin tone so that everything blends, and I'm done! I don't want my models to look Photoshopped, and I don't think they do either, so this technique works for me.
Here's a super great video on how to use frequency separation from one of my favorite photographers, Jessica Kobeissi.
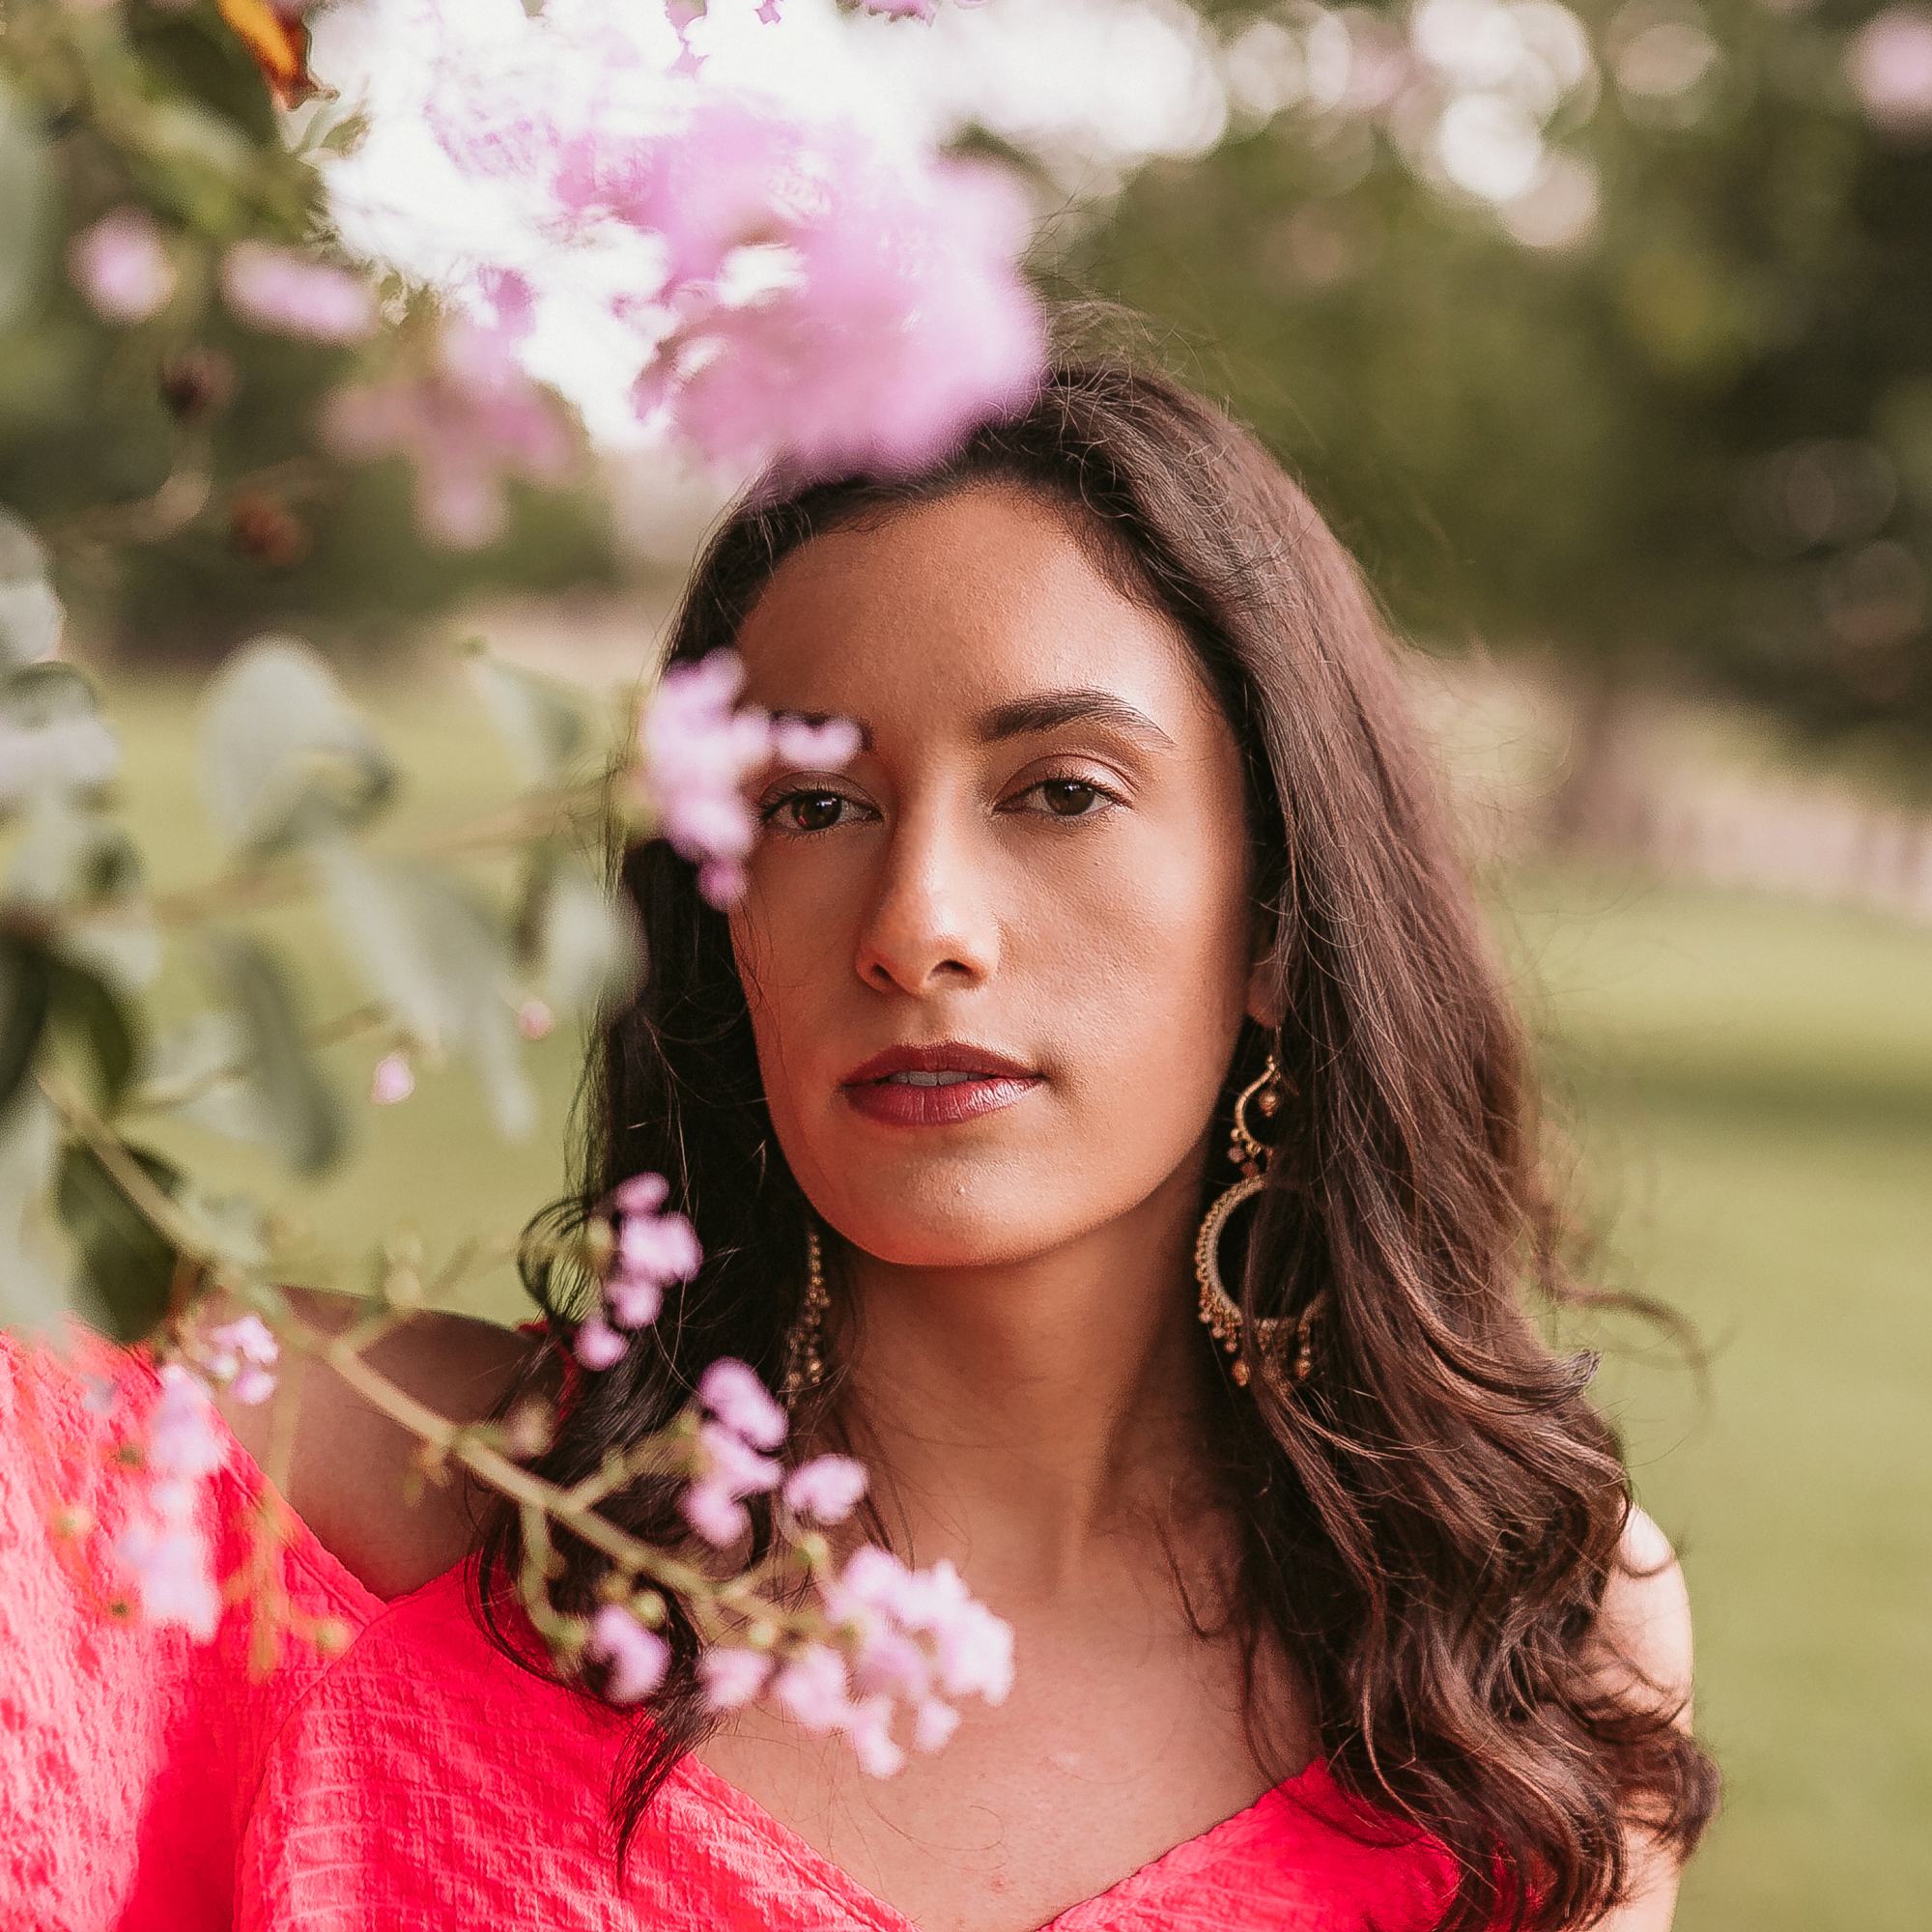
BOOM! We're done. We killed it! 👌
From here, I save the image as a PNG (Jpeg works too, but I feel like I get higher quality from PNG files). Once it's saved, I'll add it to my Dropbox or Google Drive. Then I'll open the app on my phone, pull up the image, and save to my phone's Camera Roll. Doing this ensures that I'm not losing any quality due to file compression (something that might happen if you emailed the picture to yourself instead). Last is the hardest part: figuring out the caption for your Instagram post! Luckily, Drake just dropped a 25-song album. Welcome to quotable heaven.